Recently, the Master Gardeners were asked to participate in a Garden Project for A Child’s Voice Advocacy Center in Social Circle.

A Child’s Voice exists to strengthen the coordinated community response to situations of child maltreatment, including sexual abuse, physical abuse, and witness to abuse and homicide. In 2022, 283 children and teenagers walked through their doors to receive services. They asked us to provide a beautiful and inviting entrance for families that are coming to the center due to a traumatic time in their life. After hearing about their program, we agreed, along with the Monroe Garden Club, to donate our time, expertise and resources to provide that for them…and are we glad we did!

On Planting day, over 25 volunteers showed up to till, amend the soil, and plant a garden in the front of their building. Featuring natives such as baptisia, stokes aster, coneflowers, turtlehead, and beautyberry, we also added azaleas and annuals. This welcoming garden will attract lots of butterflies and pollinators, giving a delightful cottage garden feel to the entrance.

One of the most important needs of any garden is irrigation. One of our Master Gardeners, Ron Plaster, agreed to demonstrate his expertise (and teach us) by putting in the drip irrigation. While we have heard several speakers on this topic during master gardener training, actually doing it hands on was game-changing.

If you are lucky to have an in-ground sprinkler system, that is great. Many gardens in Georgia are irrigated by overhead sprinklers, and while this practice does work, it is not the healthiest or most efficient way to water your garden. Overhead watering results in a substantial waste of moisture from watering non-target areas. In addition, overhead watering wets the foliage of plants, which can lead to foliar diseases. On the other hand, drip irrigation uses 75% less water than using an overhead system. Water is only delivered to the target area near the base of the plant where the roots are located.

Since drip irrigation occurs at the ground level, the foliage stays dry and is less prone to disease issues. Drip irrigation is relatively simple to install, components of the system are readily available, and it is much better for your plants and flowers than overhead sprinkling. Follow along with us as Ron shows us how to install drip irrigation in your own garden, leaving you more time for enjoying your garden instead of constantly pulling out the hose.

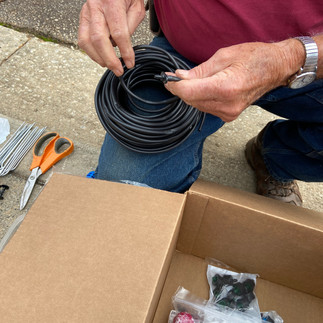
First, things first – assemble your supplies. Drip irrigation systems consist of five major components, including some type of water filter, a pressure reducer, back flow, a header pipe, and drip lines. We also used a battery-operated water timer to help automate the system. In this small garden, we used ¼ inch hose with ½ gallon/hour drip, 100 feet of dripline hose, dripline connectors, dripline endstops, automatic timer, and an end cap.

You may need different connectors, clamps, and end-stops to complete the system. These components can often be purchased at garden centers or bought online at irrigation supply companies.
When purchasing individual components and setting up a system for your garden, it is important to consider some facts before you order. You need to know the size of your home garden, how many gallons your well or other water source puts out per hour, and the length of the mainline you plan to run. The mainline ranges in size from ½ inch to 1 inch or more. The bigger the mainline, the more volume you can deliver to an area. Most irrigation companies will help you decipher what size line you need.
If you are a beginner, the complete drip irrigation systems sold by irrigation supply companies may be a good place to start. Retailers usually have several selections based on the size of the area you have to irrigate. For example, you may purchase a system designed specifically to cover a quarter-acre garden. These irrigation kits contain the proper components, hose sizes, and pressure capacities for the area they are intended to cover. You may also choose to purchase all of the components separately in order to buy only what you think you need.

In general, most vegetables require about one inch of irrigation per week in order to produce a crop. This amount can fluctuate depending on the type of soil you have and the garden requirements. Raised beds also require more frequent irrigation, as they tend to drain rapidly.

To get started, lay out your main line. Once that is done, you will want to secure the line with landscape staples to keep it in place. Crimp the end and put an endcap on it. This allows you to turn off the water flow, but be able to easily drain out the water for winterizing.

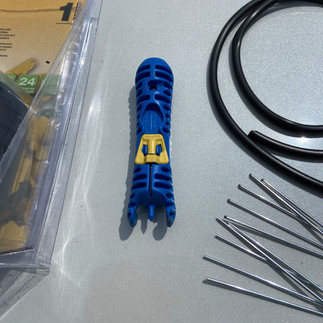
Determine where your drippiness will be. Use the punch tool and punch a hole in your main line for your dripline. We found that as the day warmed up, the tubing was more flexible and easier to punch.
Now, connect the dripline to the mainline with a connector. You will know it is seated correctly when you hear a click.
We found it was easier to clamp down the dripline with landscape staples around the flowers before you add the other connections.
Cut the dripline and use a connector to connect the two ends, making sure to weave around the flowers so they get sufficient water. You may want to put a dripline endcap at the end.

Weave the drip line through your garden, insuring each plant will receive water. For larger bushes, you may need to install its own dripline with a higher drip.

Once you have made sure that all your plants are near a water source, turn on your water and test it for leaks. If you make a mistake, simply cut it and redo it. It really is that easy!


Now just mulch over your driplines, and you can relax and watch your garden grow!
Your irrigation drip system will only deliver so much water based on the pressure and supply you have available, so it is important to design your system to meet those needs. If the area to irrigate is too big for your system, you will lack water pressure. You may want to divide the garden area into sections, or water zones, and send water at different times.
Any irrigation system is only as good as you maintain it, and drip irrigation is no exception. Check connections and emitters frequently to make sure that they are functioning properly. The water filter at the front of your system should also be checked and cleaned on a frequent basis. If it becomes clogged with sediments, the emitters down the line will perform poorly or will become blocked, decreasing the amount of water getting to your plants.

Watch out for rodents, like mice and squirrels, that may chew the lines in search of moisture. It is a good idea to have several hose line repair couplings on hand for when damage to the system occurs. If you only plan on planting a spring or summer garden, extend the life of your irrigation system by cleaning and rolling up the hoses at the end of the growing season. Store your irrigation lines in a structure out of direct sunlight. Prior to storage, be sure to drain all of the water out of the lines so they do not freeze and crack during the colder winter months.
As you can see, designing and installing a drip irrigation system is not as difficult as many people imagine. With a little bit of planning and knowledge, anyone can install a home drip irrigation system in their garden. Once you have completed your first system, you will discover how easy it is to set up. Hopefully this blog helped, but if you have any questions, contact the Walton County Extension office. Happy Gardening!


Comments